Empxtrack offers the functionality to Manage Clients. HR manager can add clients in the system that are selected by employees to fill their timesheet. This simplifies identification of number of hours that an employee spends on each client.
To manage clients, you need to:
- Log into the system as an HR Manager/ HR Admin.
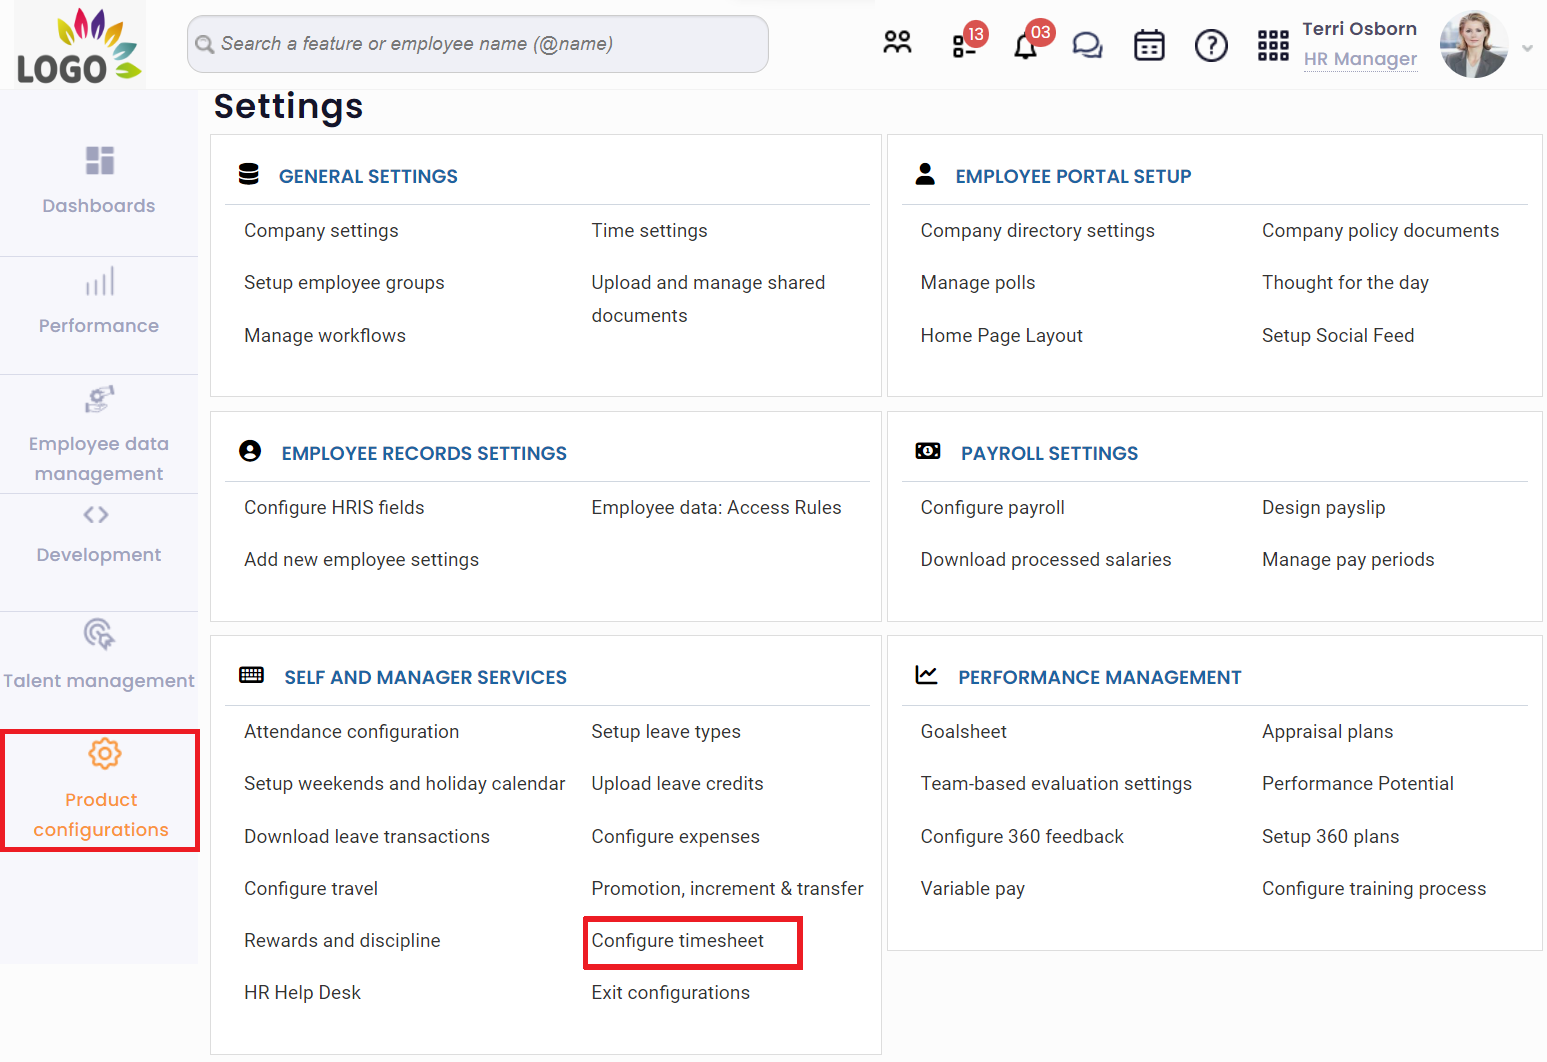
- On the Dashboards, click Product configurations and go to Self and Manager Services. Click Configure Timesheet as shown in Figure 1.
Alternatively, go to Role and features menu and click Timesheet. Under Timesheet options, click Clients.
Figure 1
The Configure timesheet page appears. Click Clients given at the bottom of the page.
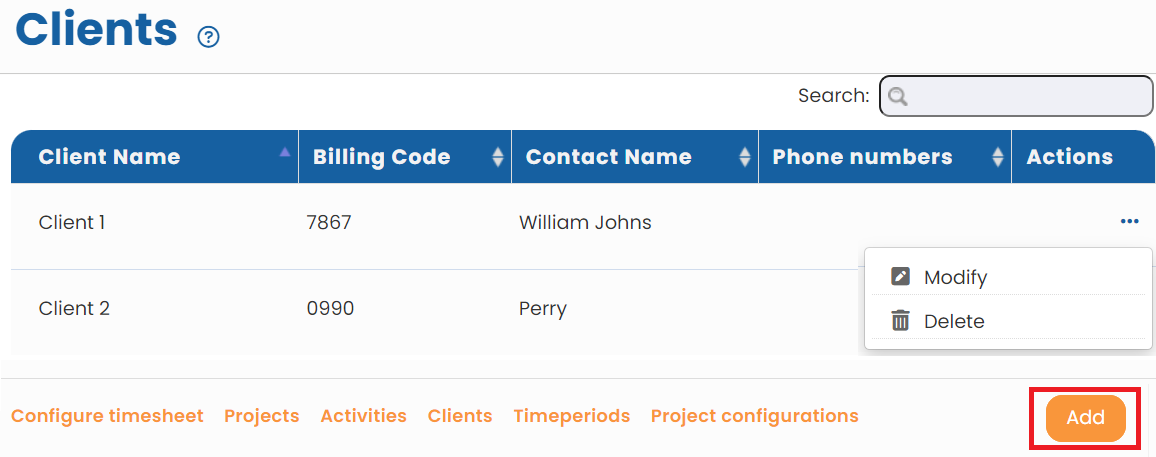
- The Clients page appears where you can add or modify details of a client, as shown in Figure 2.Employees capture time worked on each project while they fill their timesheet. Projects are associated with clients to manage client-wise reports and billing effectively. You can associate billing code, primary contact, address, phone numbers and miscellaneous details with a client field. Click on the client row or Modify icon to update the details.

Figure 2
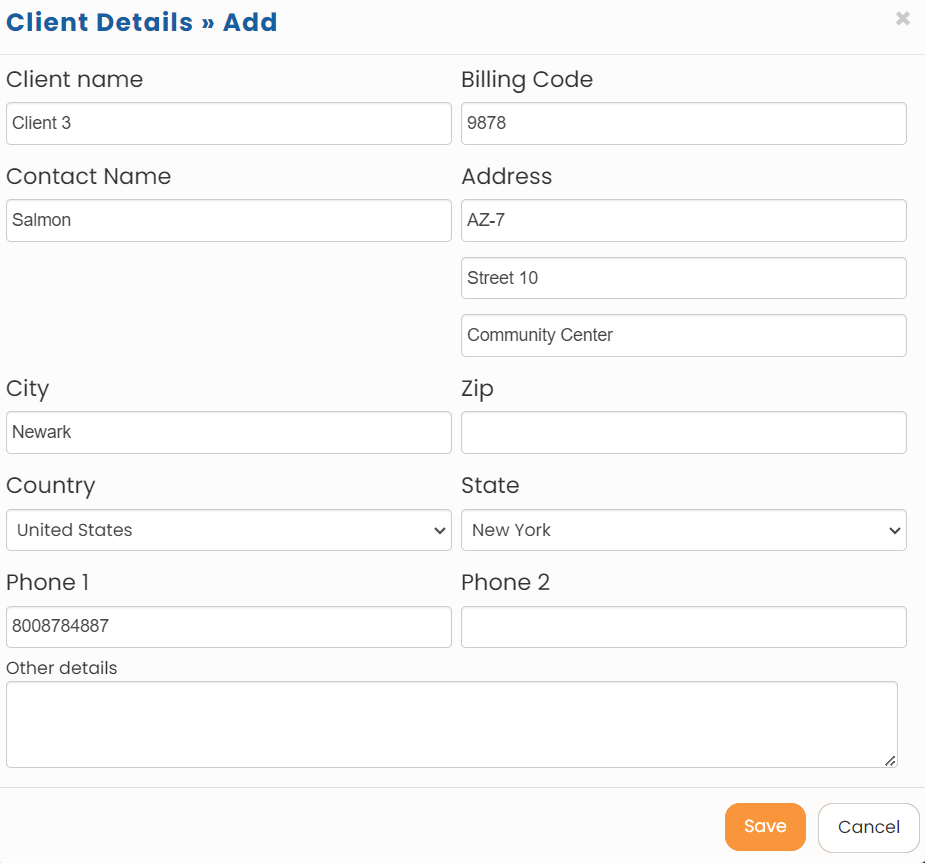
- Click Add button to add new clients. The Client Details > Add window appears, as shown in Figure 3.

Figure 3
- Provide the name of the client in Client Name field and the spoke person’s name in the client organization in the Contact Name field.
- Provide the billing code and the address of the client company in the Billing Code and Address fields.
- Specify the City, Zip, State and Country of the client company in their respective fields.
- Provide the phone numbers of the client in the Phone 1 and Phone 2 fields and any other details about the client in the Other Details field.
- Click Save. The client details are successfully added to the system and a message suggesting the same appears on the screen.
The client details added lately appear as shown in Figure 4.
Figure 4
Learn more about Empxtrack Employee Time Tracking.
Click on each of these links to know more about them:


