Empxtrack allows employees to record their time spent on different activities and projects in Timesheet. The system displays a weekly Timesheet. The weekends, holidays, and leave are already marked in the Timesheet. Employees can fill timesheet on weekends, leave and holidays depending on the timesheet configuration.
To fill a timesheet, you need to:
- Log into the system as an Employee.
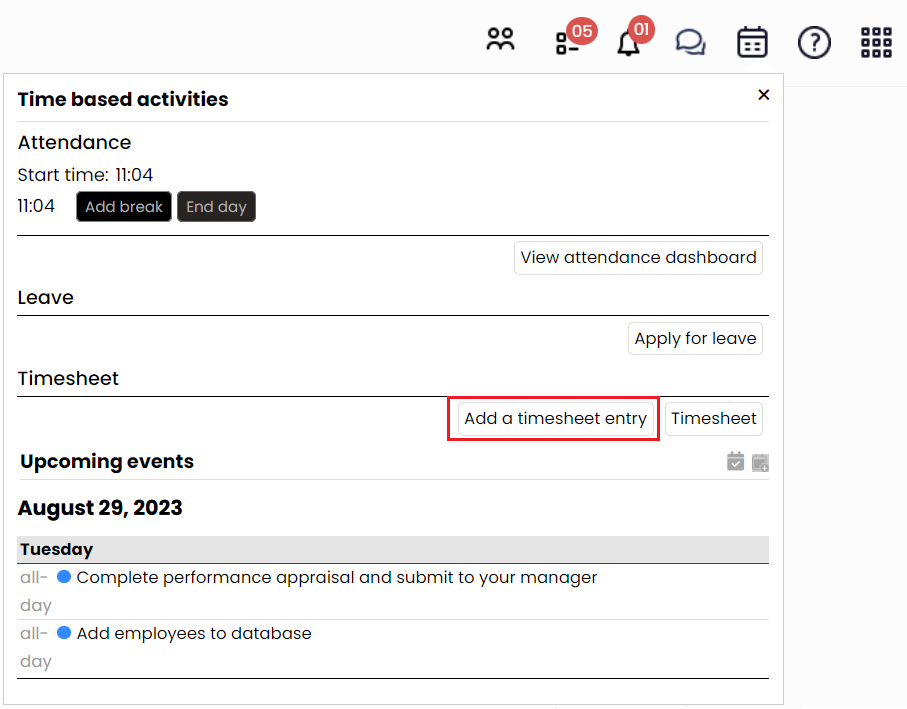
- On the Dashboards homepage, click on the Time based activities
 icon from the quick access icons bar.
Alternatively, you can click Role and features menu icon and fill timesheet entries.
Figure 1
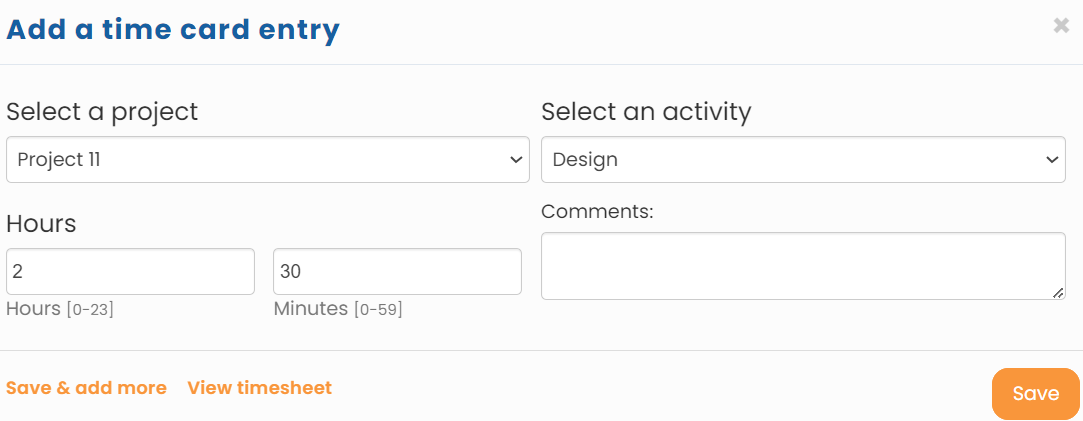
- Click Add a timesheet entry to add time card entries. A dialog box appears where you can fill time entry as shown in Figure 2.

Figure 2
- Select the project for which the work has been done from the Select a project dropdown. An employee will only see those projects in the dropdown that are assigned to them.
Note: In case you don’t see a project, request your HR Manager to add you to the project such that you can capture time for the same. - Select the activity on which worked is done from the Select an activity dropdown. An employee will only see those activities in the dropdown that are associated with the project.
- Enter the time spent on the activity in Hours and Minutes boxes of Hours field.
- Enter your comments on the activity done in the Comments field.
- Click Save and continue with the same steps to add more entries. The timesheet is successfully filled and saved. Once you have captured entry for a specific time period, you may need to submit the same. The approval process depends on your organizations policy.Note: If you have filled excess hours that go beyond the number of maximum hours configured (if configured) then the excess hours appear in red color. This happens when the maximum number of hours are configured by the HR manager in the timesheet configurations while putting a check on the excess hours.
Learn more about Empxtrack Time Tracking.
Click on each of these links to know more about them:


