With setup access and update rights, you can define multiple user roles. Each role can be assigned a view/ edit permission on different sections of employee data using this functionality. Employee data access rules functionality helps in setting access and update rights on employee information.
HR needs to setup access and update rights functionality to hide certain sections of employee information from managers and restrict the update process of employee records.
Note: The steps mentioned below are of Empxtrack Enterprise product.
To set access and update rights, you need to:
● Log into the system as an HR Manager or HR Admin.
● Click on the Product configurations.
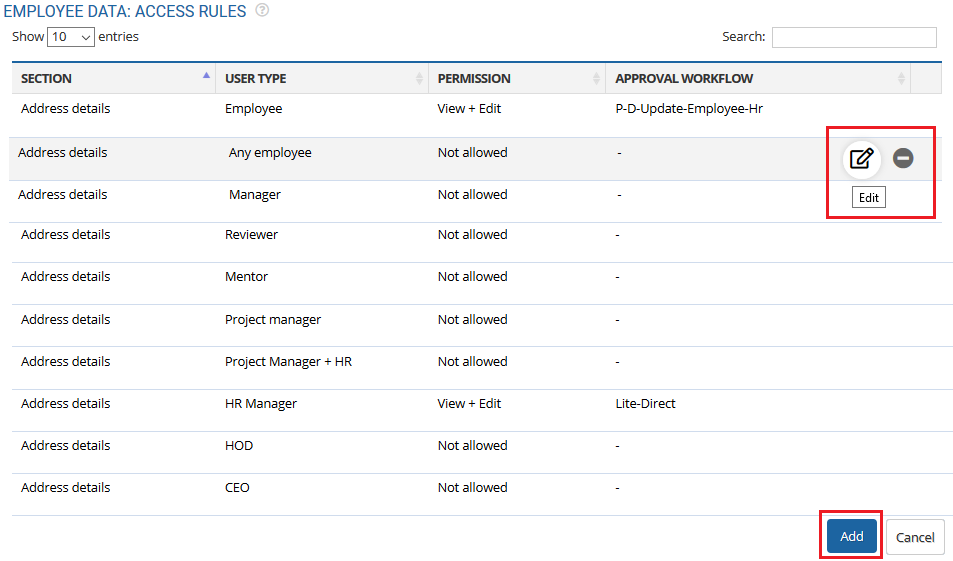
● In the Employee Records Settings section, click Employee data: Access rules link.

● A list of features are given that can be enabled or disabled. When a feature is enabled, the permissions can be set for all the stakeholders in the system such as Employee, Manager/ Reviewer, HR Manager, and HOD/CEO.
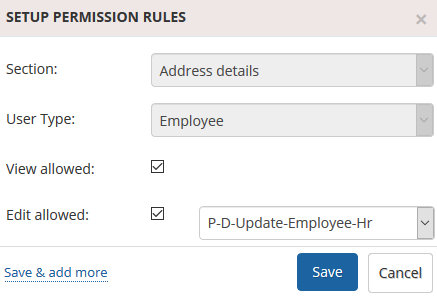
● Disable a feature make it inactive or hide. Click anywhere in the row or View icon to setup permission rules, and workflow for each role. View and Edit check boxes can be selected/ deselected to setup the view and edit rights.

● Select View checkbox for each role to which you want to allow view permission for the role on that module, For example, to allow view permission on Relationship with other employees feature to Employee, HR Manager and HOD/CEO, select View checkbox under Employee and HR Manager, and HOD/CEO.
The view permissions are granted to Employee, HR Manager and HOD/CEO but not to Manager and Reviewer, for whom the View checkbox is deselected.
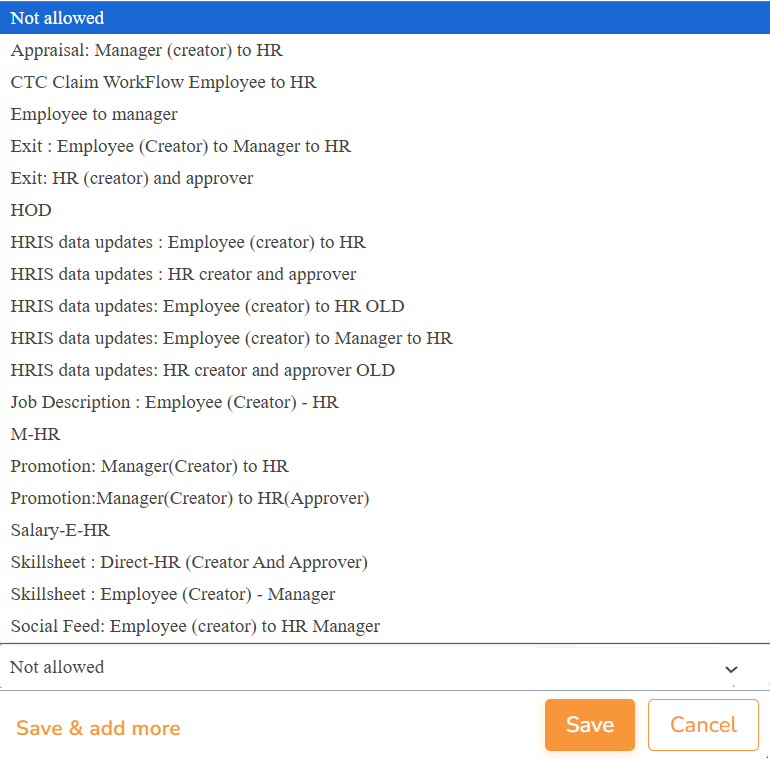
● To allow edit permissions, you need to select a workflow that needs to be followed to finalize the changes. For example, if an employee uploads his/her photograph, then the uploaded photograph needs to be approved by the employee’s manager and then the change would be finally accepted by the HR Manager and the database will be updated with the employee’s photograph. Thus, in such a scenario, you need to select the Emp To Mgr To HRM workflow for the employee.
● Select the desired workflow for each role that needs to be followed to allow changes.

● Click Save. The configurations are successfully saved and a message suggesting the same appears.
Learn more about Empxtrack HRIS
Suggested Links


