Skip to content
This help page demonstrates step wise instructions to modify and design payslip format. A payslip is a well formatted document that shows the salary breakup into various components along with deductions, taxes, accrual, PF and ESI details. The design and format of a payslip can be customized to map company requirements.
Note: The option to design payslip is available in Empxtrack enterprise software. The system provides a standard format for generating payslips. Upgrade your Empxtrack Eazy payroll software to customize payslip design.
Watch a short video on how to upgrade Empxtrack Free Payroll software and get additional licenses, advanced features and free trials of additional products.
To design the payslip, you need to:
● Log into the system as HR Manager.
● Click on Product configurations. Under Payroll Settings section, click the Design Payslip link.
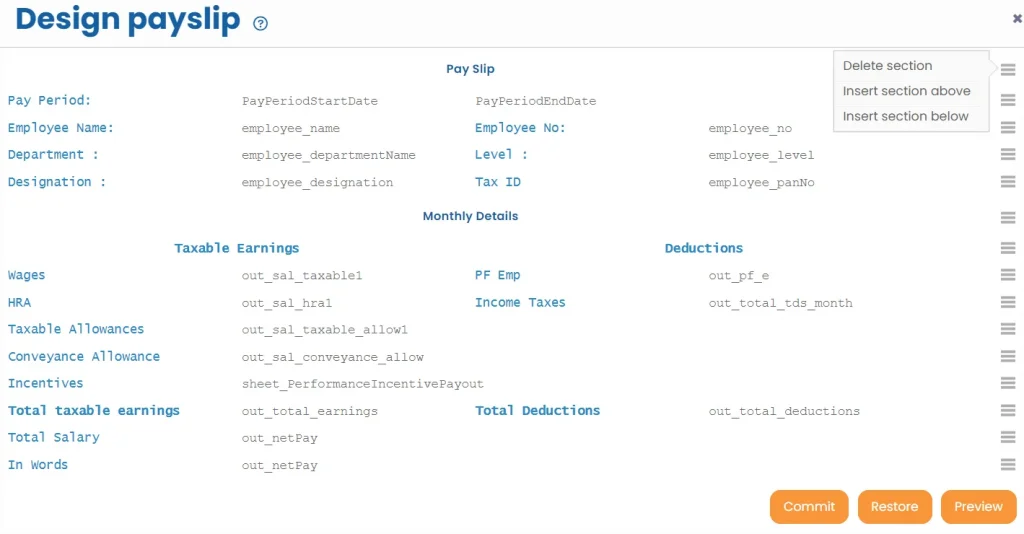
● The page displays a default payslip template. Modify the payslip and customize it as per your company requirement.
● Click on the Title “Pay Slip” to modify it.
● Make changes in styling and click Save.
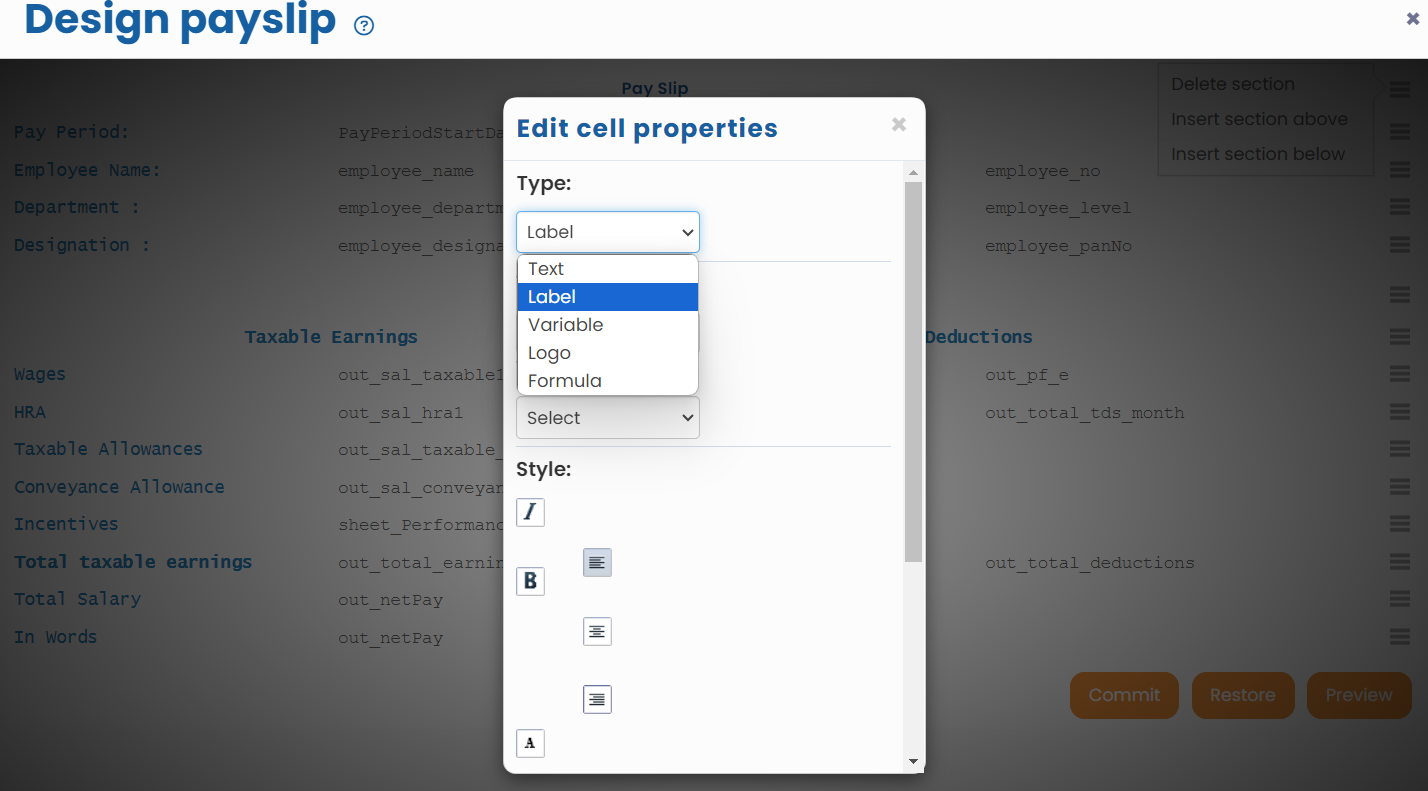
● Click on any field label to modify it. The Edit Cell Properties window appears.

● Select the type for the field from the Type field. Keep the Label option selected, if you want to modify the label else select Variable option.
● Select the preferred Variable type and the name of the Variables.
● Modify the style from Style options, modify the column span by combining columns for the cell, if the name is long from Number of columns spanned field.
● Click Save.
● The label is successfully modified.
● Similarly click on a variable to edit it. Follow the same steps from above to make the required changes for a variable.
● To add a row and filed to design payslip, click on the Action icon given for each row where you want to add a row. Click Insert row above.
● Once the new section is added, go to the Actions icon again. Click Insert row above to add a new row above the current row, or click the Insert row below option to insert a row below the current row.
Note: For each heading in the payslip, you will get the option to insert or delete a section. Insertion and deletion of rows is given for fields between each section.

● A new row is added below/ above the current row. The new row displays four columns with Value keyword.
● Click on Value 1 field to modify it and enter a new name for the field you want to add. Click on Value 2 field to add a value for the field.

● Click Value 3 and Value 4 labels one by one, and input new names and change the properties as required.
● Click Delete to delete the cells if these cells are not required. The extra cells are successfully deleted.
Suggested Links
- Payroll Configurations
- Setup Payroll Variables
- Setup Variables for Payroll Reports
- Setup Salary Structures
- Add Salary Heads to a Salary Structure
- Assign a Salary Structure to Employees
- Upload Salary Structure
- Upload Past Salaries for Employee
- Download Employee Salaries
- Setup Investment Declaration
- Configure Company Settings for Payroll
- Setup Claim Variables