Skip to content
Employees create travel request to claim expenses against a business travel. Manager approves the claim request as per the workflow. HR can also create travel request on behalf of an employee.
To create a travel request, you need to:
- Log in to the system as an Employee.
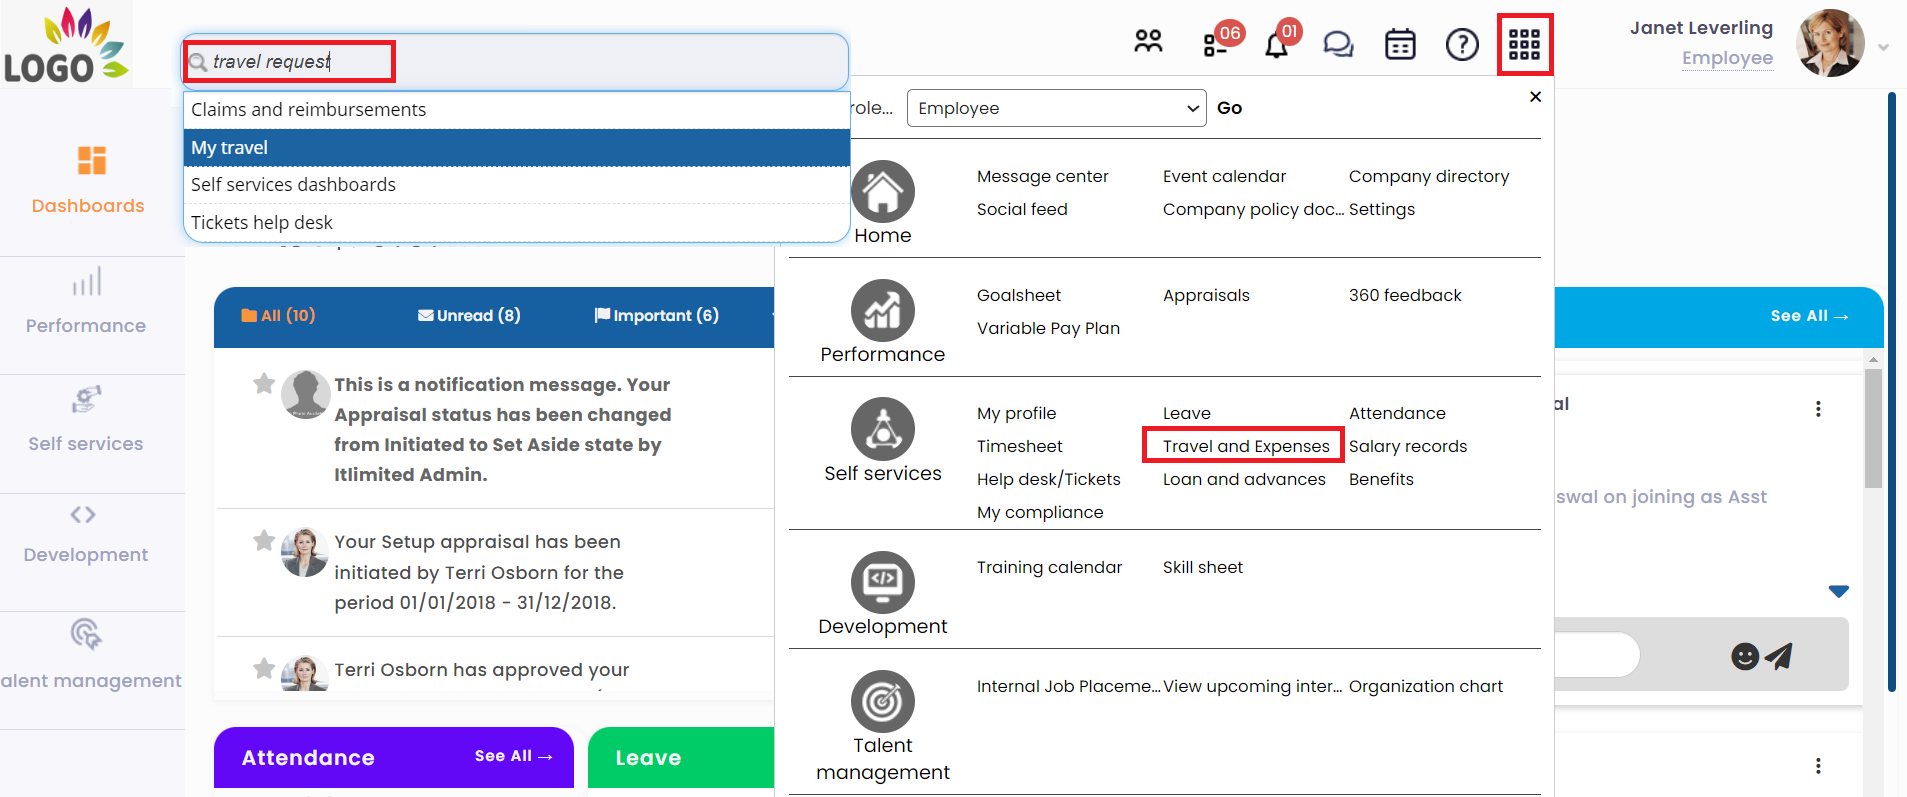
- On the Dashboards homepage, go to Role and features menu
 icon and click Travel and expenses as shown in Figure 1. You can also click Self services and scroll down to Travel section.
Alternatively, you can type “travel request” in the Search bar and select the option as My travel.
Figure 1
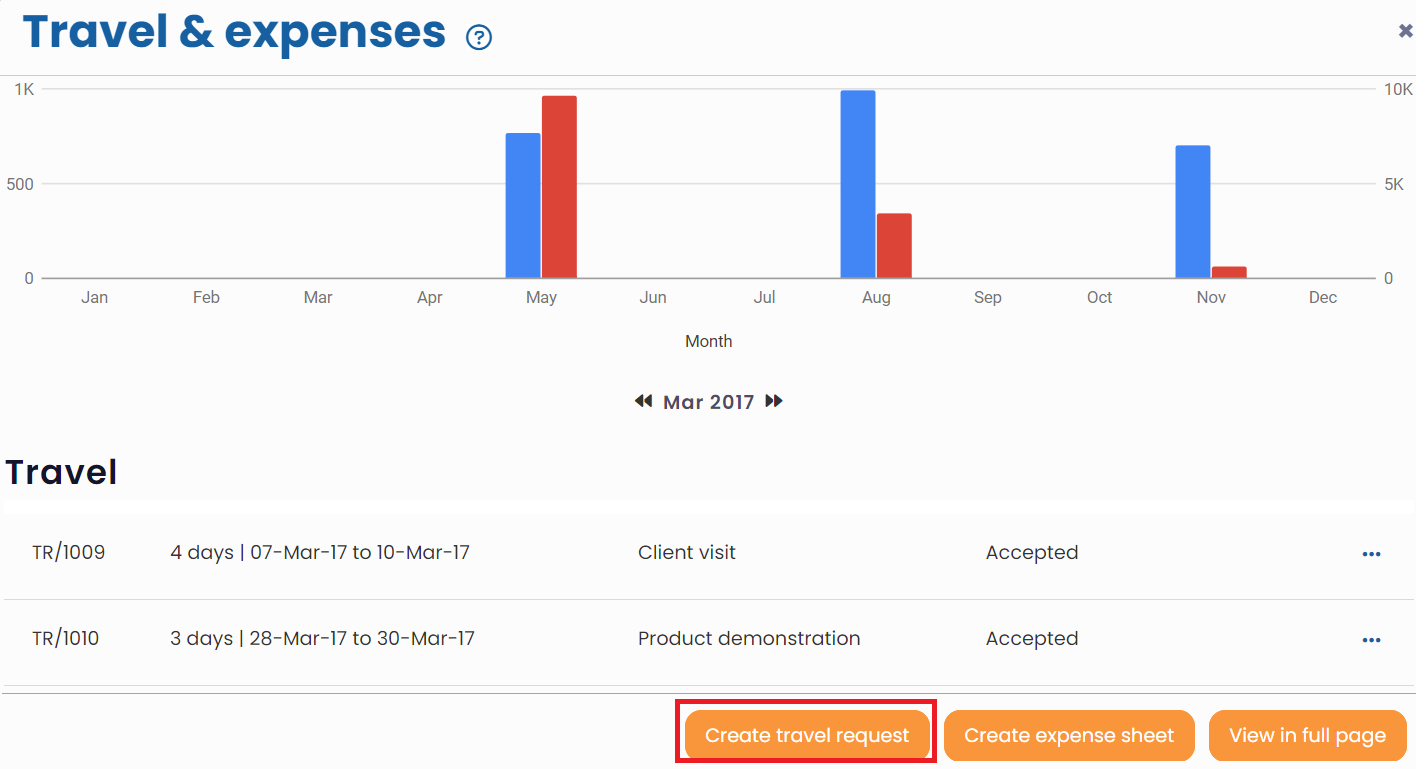
- Click Create travel request for creation of a new travel request as shown in Figure 2.

Figure 2
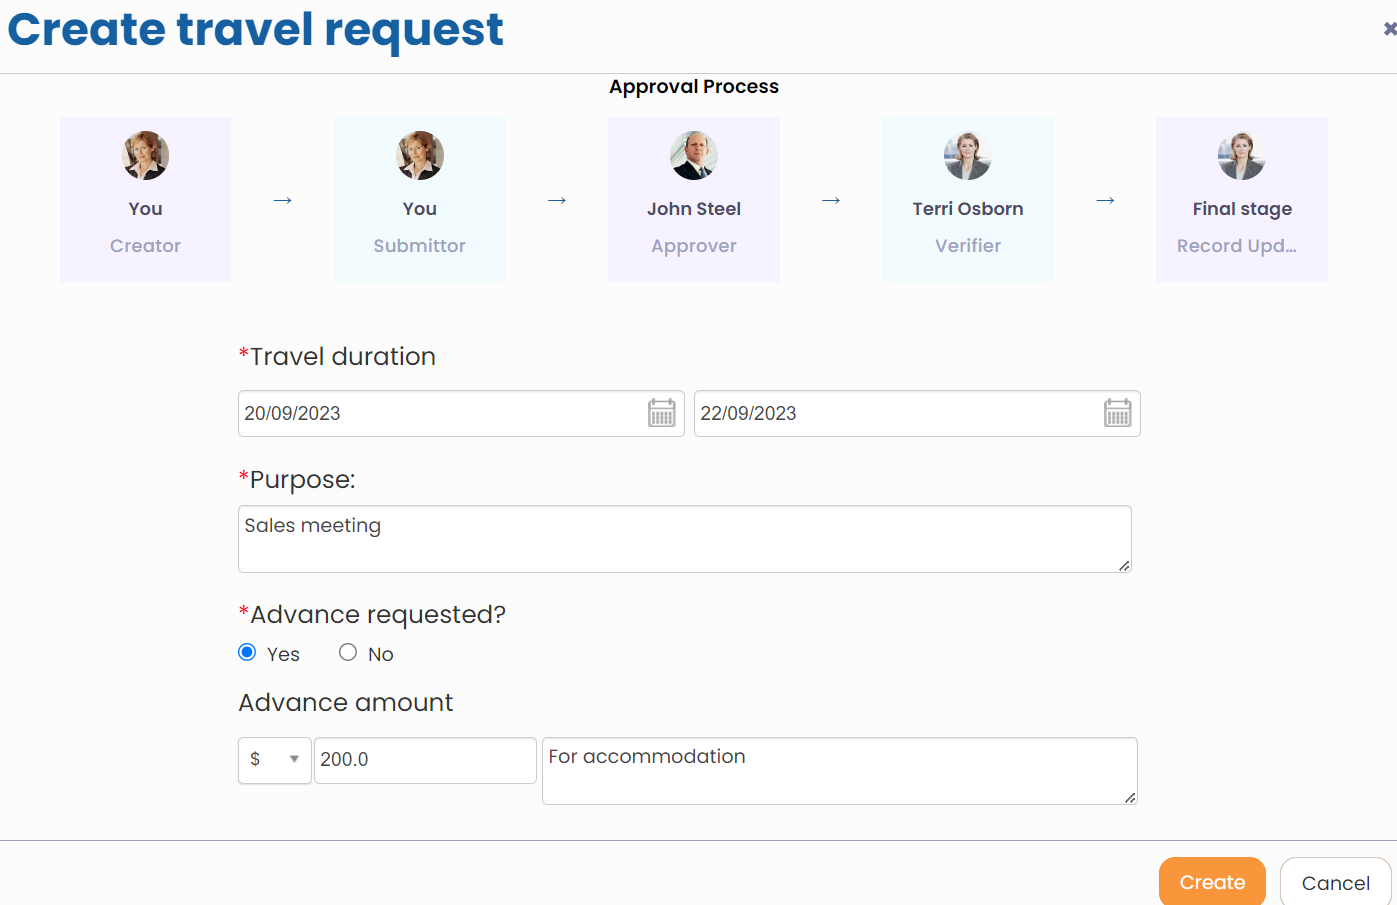
- The Create travel request window appears, as shown in Figure 3.

Figure 3
- Provide the dates of travel in calendar controls available in the Travel Duration fields.
- Provide the purpose of the travel in the Purpose field and then select Yes from the Advance Required field, if you want to request for the advance payment for the travel expenses. The advance payment fields appears.
- Provide the advance amount required in the Advance Amount field and the advance details in the Advance Details field. The advance payments can be made to employees to facilitate their travel. Advance payments made are deducted from the actual expenses made by the employees at the time of final approval of expenses.
- Click Create button to raise a travel request.

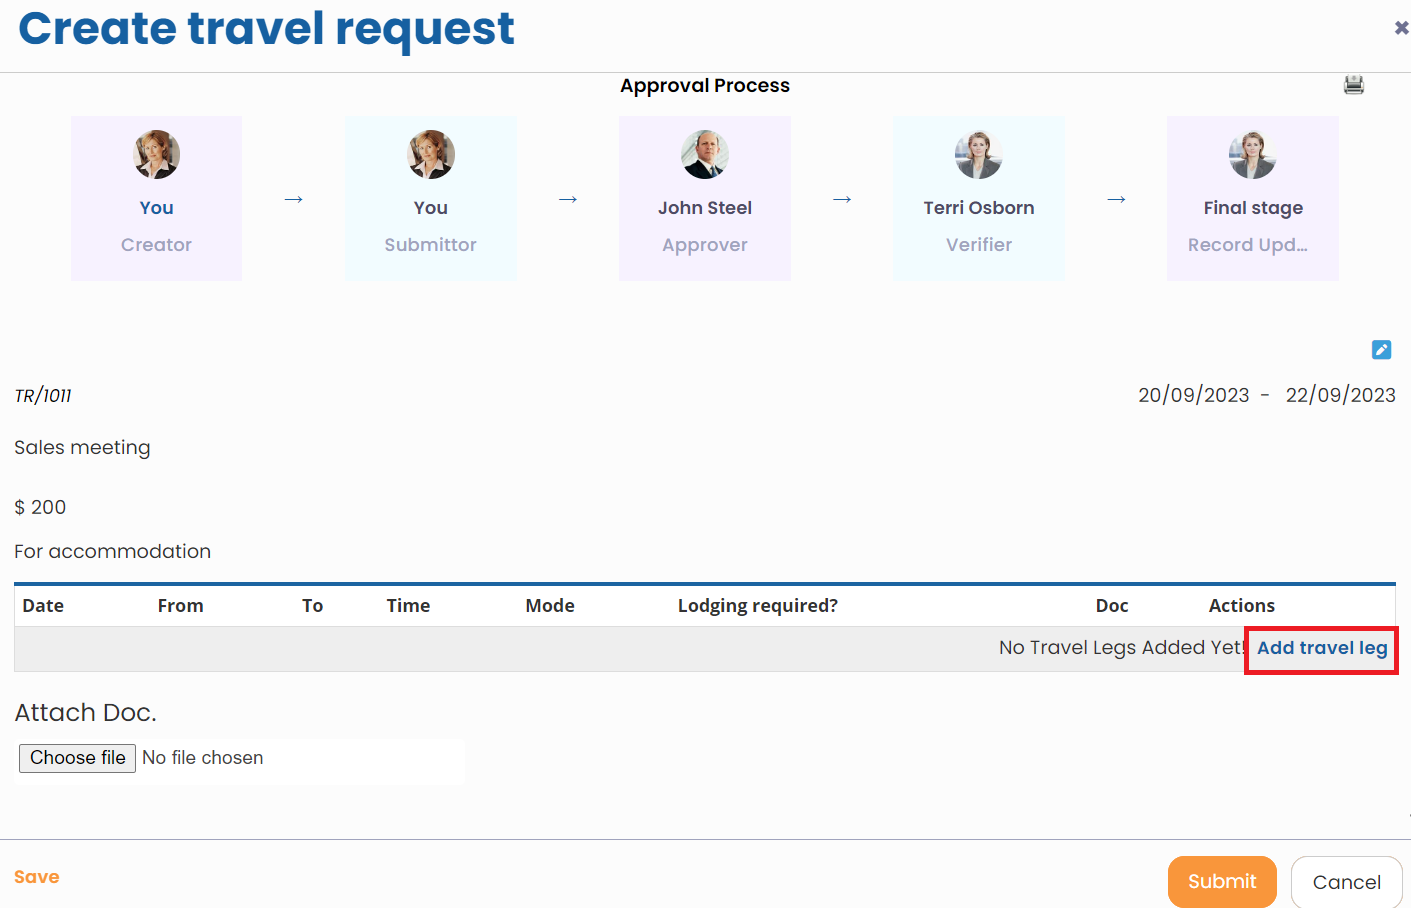
Figure 4
The Travel Request window appears, as shown in Figure 4. The window displays the travel request details for the travel request that you have created and allows you to add travel legs to the travel request. Travel legs are the stopovers and changeovers that you have to make in your journey.
For example, if you have to change your air craft at Newark airport during your journey from New York to New Jersey then you need to add two legs for the same journey, one from New York to Newark and the other from Newark to New Jersey.
The window also displays the approval workflow of the travel request with the name of the approver at each stage.
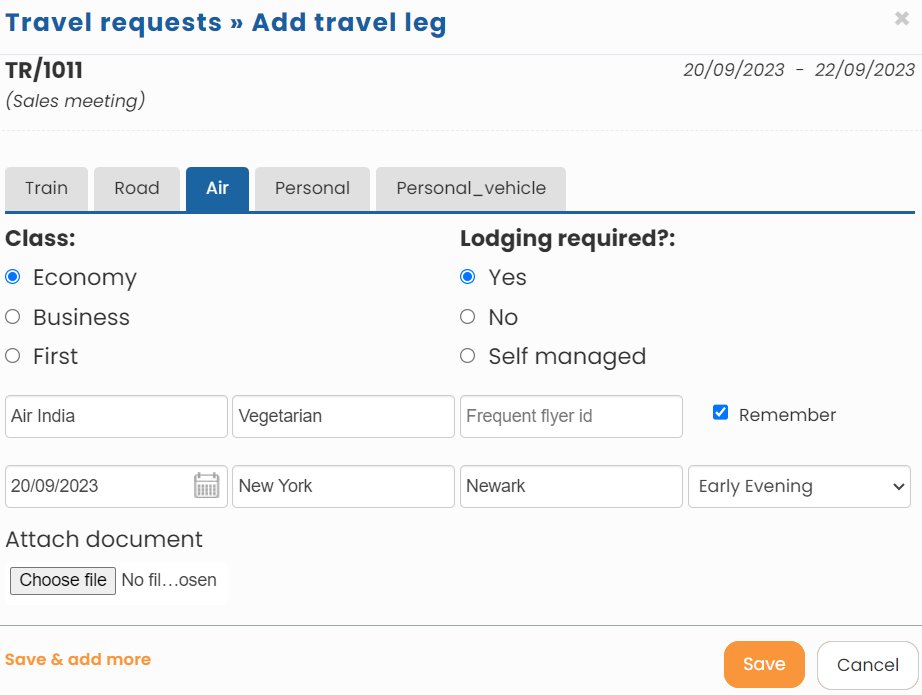
- Click Add travel leg link to add a travel leg to the request. The travel leg window displays the travel request details Figure 5.
- Select the mode of travel from the Mode of Travel field and the date of travel from Travel Date calendar control.
- Specify the starting point and the end point of the journey in the Starting Point and Travel To field.
- Select the time of travel from the Travel Time dropdown. You can select exact time in hours or suggestive time such as early morning or late evening from the field.
- Select Yes option if lodging is required from the Lodging Required field. Select No option if lodging is not required (in case you are not staying while traveling) else select Self Managed option if you are staying while traveling but managing lodging yourself.
- Click Save to save the leg that you have added or click Save & add more to save this leg and add more legs to the travel request.

Figure 5
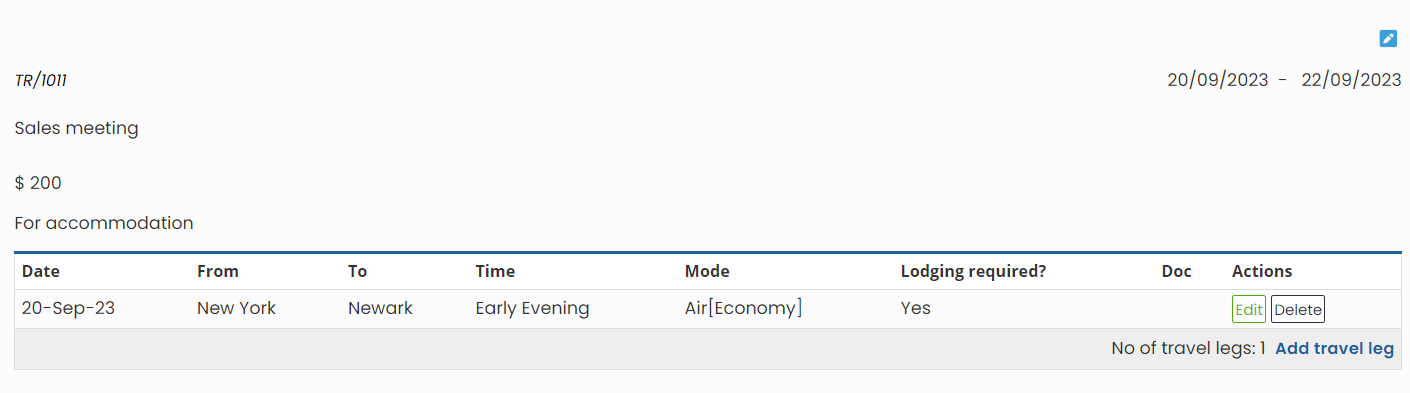
The travel leg that you have added can be see in the Travel Request page as shown in Figure 6.
- Select the document that you want to attach as a proof of travel from the Attach Document field by clicking Choose file button.

Figure 6
- Click Add Note link at the end of the window to add a note about the travel request.
- Click Submit. The travel request is submitted to your manager as per the travel flow configured.The travel request is successfully created and a message suggesting the same appears.The manager can now view and take action on the travel request. Click here to know more about Manager Services.
Learn more about Empxtrack Travel and Expense
Click on each of the following links to know more about them: