Skip to content
Empxtrack allows the creation of 360 feedback plans with customized fields. The software stores different feedback configurations and each of these is called a plan. View the existing feedback plans in the Setup 360 Plans page or create a new plan to meet your requirements.
To configure a 360 plan, you need to:
● Log in as HR Manager.
● Click on Product configurations. In the Performance Management section, click Configure 360 feedback. A new page will appear. Click on the Setup 360 plans link. The page displays the plans that already exist in the system. You can modify or delete the existing plans and create new plans.

Modify and Delete an Existing Plan
● Click on the Delete option under the Actions icon corresponding to the name of the plan to delete an existing plan.
● Click on the Edit option to modify the settings of an existing plan. A new page appears where you can view 4 tabs – Plan Introduction, Time & notifications, Reviewer selection and Form & settings tabs.
● By default, the Plan Introduction tab is opened. Once you have made the required changes in these tabs, click Save.
Create a New 360 Plan
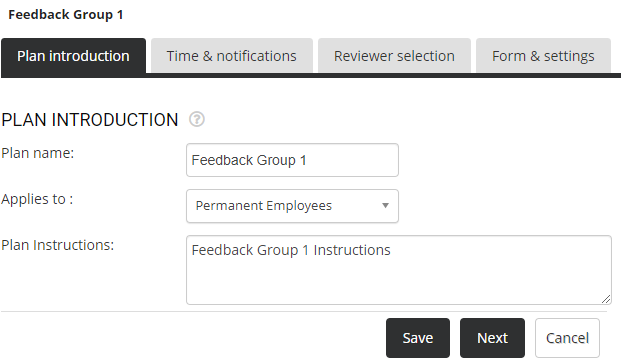
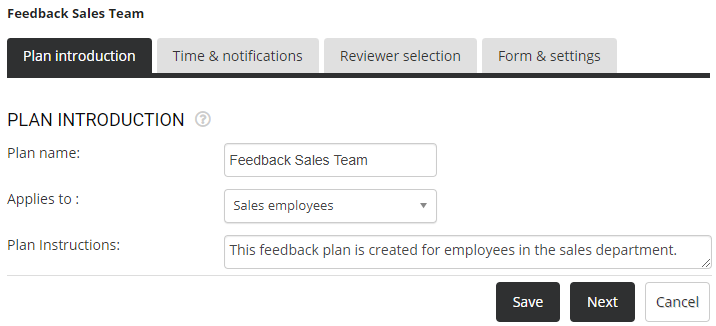
● Click Create a new 360 plan. A new page appears where you can setup 360 plans.

● Provide the name of the feedback plan and then select the global group to which the plan applies.
● Provide a brief description of the plan and the instructions to use this plan (if required).
● Click Save. The new plan is created successfully, and other 3 tabs (Time & notifications, Reviewer selection, and Form & settings) appear.
● Click on the Time & notifications tab to specify the workflow for finalization of reviewers. The page also allows you to specify the 360 feedback initiation dates and allows you to configure reminders for all the stakeholders involved.
Note: Reviewers are the people who will complete a 360 evaluation for an employee. Once a reviewer is stored in the system, it will be available the next time too and will automatically show up. This section also contains the automatic notification rules for the selection of reviewers. Selection of reviewers will take place in the next tab, i.e. Reviewer selection.
● Select the workflow to finalize the stakeholders who will provide 360 feedback for employees from the Workflow For Reviewer Finalization dropdown.

● You can now configure reminders for all the roles involved in the workflow from Notifications on workflow movement section. In this section, the number of users changes depending on the workflow selected under the headings For Reviewer finalization workflow and During 360 feedback. The selected workflow here is Employee to manager to HR.
● In the For Reviewer finalization workflow section, select the Display reminders after _ days checkbox for Creator/Submitter, Approver and Verifier (if exists). Specify the number of days for each stakeholder to send a reminder to take action after initiation of feedback plan.
● In the During 360 feedback section, select the Display reminders after _ days checkbox for Reviewers and specify the number of days for sending a reminder.
● Specify the number of days after the last message when the feedback should be automatically closed using the Auto close feedback ___day after message option.
● Click Save. A message suggesting that the settings are saved successfully appears on the screen. Now click Next to move to the next section.
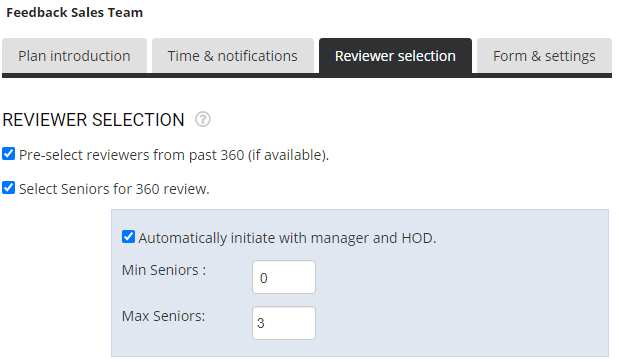
● The Reviewer Selection page appears, which allows you to set rules for the selection of the reviewers who would be allowed to provide feedback for an employee in this 360 feedback plan.
● Select Pre-select reviewers from past 360 (if available), if you want to display a list of 360 reviewers from the previous review in the reviewer’s list.
● Select Seniors for 360 review, if you want to accept feedback from the seniors of the employee, and then select Automatically initiate with manager and HOD option to automatically include the reporting manager and the HOD of the employee in the reviewer’s list.
● Specify the minimum and maximum number of seniors to be selected as reviewers.
● Similarly, follow the same steps for all the subordinates, peers, and external reviewer selection options.
● If you want to include the employees in their review process, then select Automatically include the employee in the process for self review.
● Click Save to update settings. A message suggesting the same appears on the screen. Now you can click Next to move on to the next tab.
● The Form & settings section appears where you can store multiple 360 form templates in the system. Each plan can be associated with just one template. You can have only one form in a 360 feedback plan.
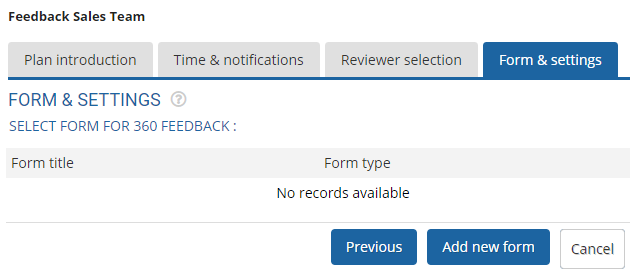
Note: Form template attributes are shared across 360 reviews. If you make a change in a template that is being used in another review, the changes will show up in the other review as well. Hence it is advisable to create a new form for each plan. Select the appropriate form and then configure it.
● Click Add new form. A new page appears where the form template can be seen.
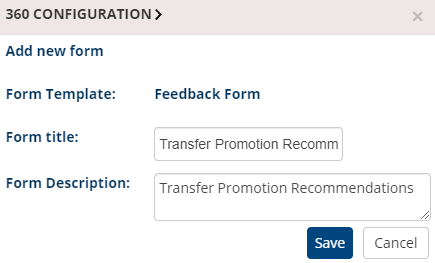
● Provide the title and the description.
● Click Save. The form is successfully added.
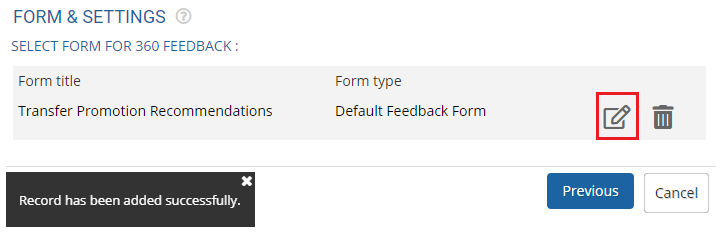
● Now, click on the Edit option to modify the form. The configure form page appears.

● Modify the Title and Help displayed to the user in the corresponding textboxes.
● Select an option in the Rating and Comment Options and then choose a rating. Click Manage rating link to modify the rating scale. To view steps to modify ratings, visit the help page Create a new Rating Scale.
● In the Selected attributes section, some of the attributes can be seen. You can modify, delete and change the sequence of attributes by clicking on the Edit, Delete icons and top ![]() and down
and down ![]() arrows respectively. To add a new attribute, click Add new attribute. To add one of the existing attributes, click Add an existing attribute.
arrows respectively. To add a new attribute, click Add new attribute. To add one of the existing attributes, click Add an existing attribute.
● Click Save. The form is added successfully, and a message suggesting the form appears on the screen. Once the form is saved, the process to setup 360 plans is complete.
Learn more about Empxtrack 360 Degree Feedback
Suggested Links